Background or “What is Vienna-PTM all about?”
The basic building blocks of proteins are the 20 canonical amino acids. However, amino acids in proteins are frequently exposed to different enzymatic and non-enzymatic post-translational modifications (PTMs), which can completely alter their chemical nature and even affect the structure and/or dynamics of the whole protein. From enzymatic activation to cell-cycle control to transcription and translation regulation, PTMs of proteins play a key role in different cellular processes by directly affecting protein structure, dynamics and interaction networks (YL Deribe et al., Nat. Struct. Mol. Biol. 2010 Jun, 17(6), page 666-672).
The Vienna-PTM webserver provides an automated procedure for introducing PTMs of choice to a user-supplied protein 3D structure (PDB file) with 259 different enzymatic and non-enzymatic modifications currently available, including phosphorylation, acetylation, methylation, hydroxylation, carbonylation and other PTMs. The server also makes available force field parameters needed to run MD simulations of the modified protein within the framework of the widely used GROMOS 45A3 and 54A7 force fields and GROMACS simulation package.
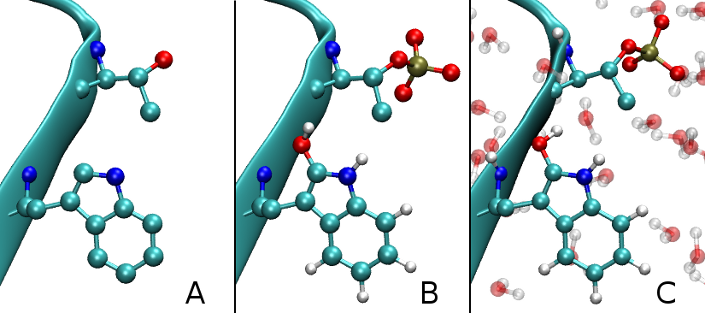
Figure 1: Illustration of the modification workflow: A initial PDB structure, B post-translationally modified structure and C energy-minimized structure including water molecules which have been added. New atoms are attached with pre-minimized coordinates, while energy minimization gives them a proper local orientation with respect to the whole structure.
How to use Vienna-PTM?
As input for subsequent simulations etc., a PDB file with post-translationally modified amino acids has to be generated by the server. In order to do so, you can provide either a prepared file from your hard drive or give a PDB identification code (see PDB.org). In the latter case, the file will be retrieved by the server automatically.
Step 1: Generation of modified PDB files
 Upload your PDB file and configure settings as needed:
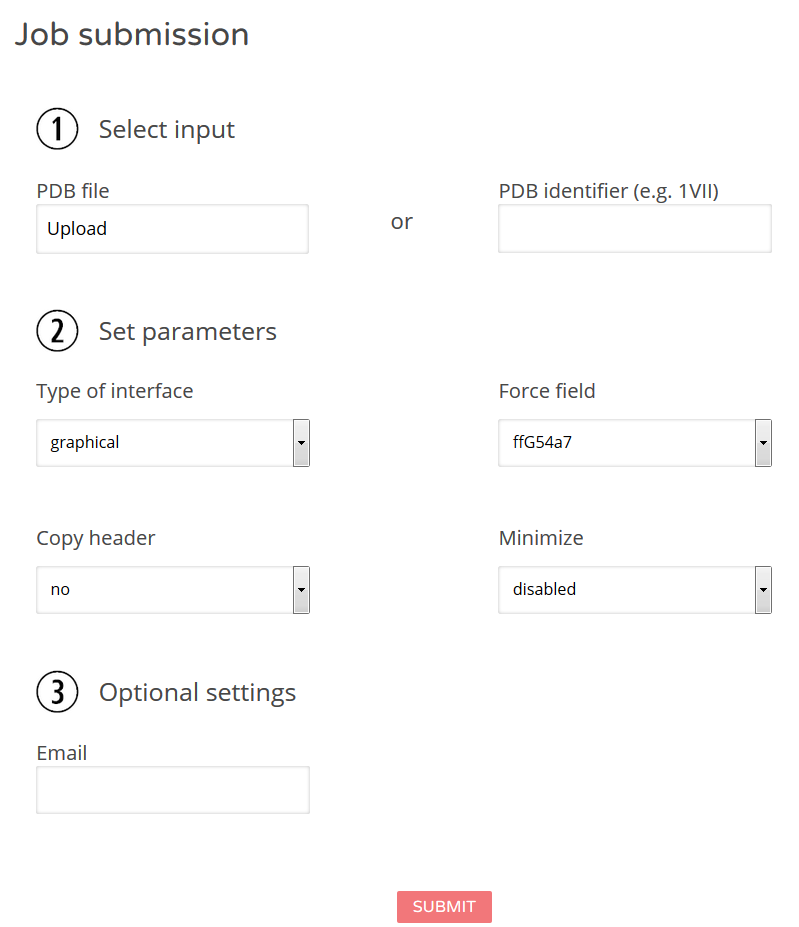
Figure 2: Job submission. You will be required to provide an initial PDB file (see also above) to select the type of menu (graphical is recommended and default) as well as the force field version used and whether an energy minimization should be applied or not. Please note that a considerable number of PDB files do not conform with standard formatting and are thus not minimizable (although they still might be modifiable). Moreover, terminal modifications at the beginning or end of protein chains require minimization. The process may takes some time. However, if it takes too long, the minimization step will be aborted, but you can still download the unminimized modified file.
 Select the required modifications:
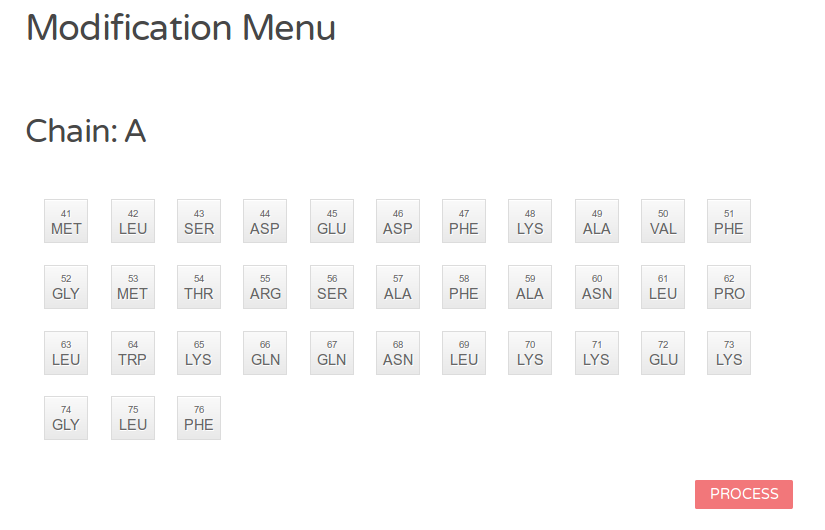
Figure 3a: Graphical menu. All amino acids are grouped by protein chains and represented with buttons indicating their position and type. See also the color legend.
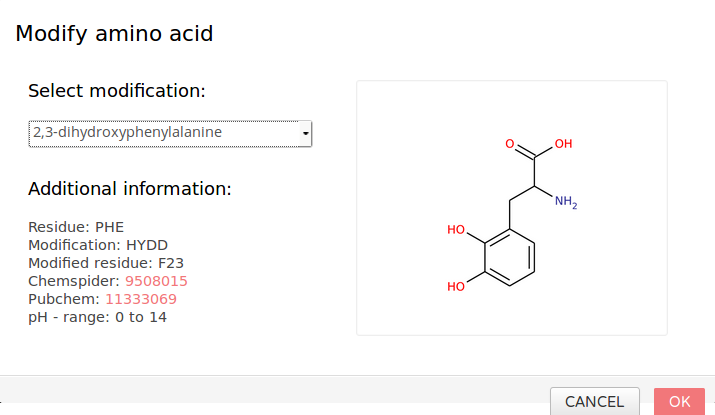
Figure 3b: Dialog menu for modification. Select the required modification by the drop-down element in the upper left corner. The menu will report the original residue, the modification (internal type) and the resulting residue as well as other information. The chemical structure is shown on the right.
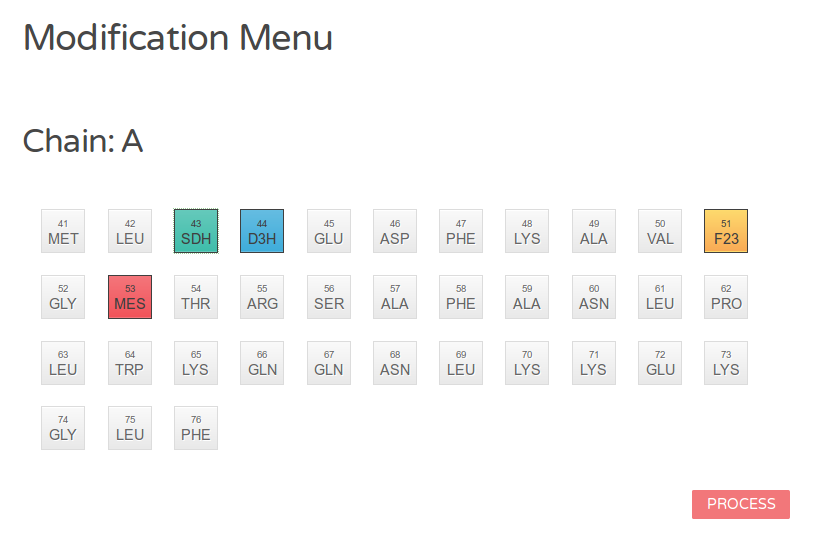
Figure 3c: Graphical menu (with modifications). Residues, marked for modification, are highlighted by four different colors indicating charge state and polarity. Proceed by clicking on the button at the bottom.
 Processing and retrieving results:
You are forwarded to a site which checks the status of your job every few seconds until it is completed. If you have given an email address, you will also receive a message.
If everything went fine, you will see the report page:
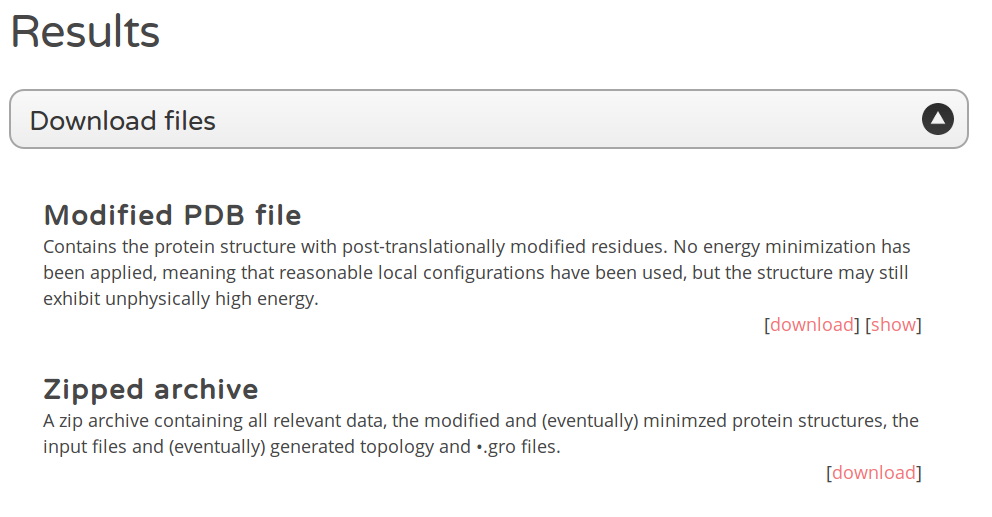
Figure 4: Results page. The results page contains information on the workflow performed, a graphical representation (using Jmol), the sequence of the generated protein file and, most important, options for downloading the generated modified PDB file. You might choose between the modified (or minimized) file itself or an archive (zipped) containing all related files including GROMACS topologies.
Step 2: Running simulations with modified files
Download the files generated:
Given “XYZ.pdb” has been your initially provided PDB file, the modified protein is saved in the file called “mod_XYZ.pdb” and, in case minimization has been applied, the zip package also contains a “min_XYZ.pdb”, “output.gro”, “output.top” and “E_minimized_output.gro” file, respectively. The minimization instruction file is also included.
/usr/local/gromacs/bin/pdb2gmx -f mod_XYZ.pdb -o output.gro -p output.top -ignh -ter -ff G45a3 -i posre.itp

/usr/local/gromacs/bin/grompp -v -f minim_vacuum_ffG45a3.mdp -c output.gro -p output.top -o input_E_minimization.tpr -po mdout.mdp >>minlog.log &2>>minlog_err.log &

/usr/local/gromacs/bin/mdrun -nice 0 -v -s input_E_minimization.tpr -o E_min_traj.trr -c E_minimized_output.gro -e E_min_ener.edr -g md.log -pd yes >>minlog.log &2>>minlog_err.log &

/usr/local/gromacs/bin/editconf -f E_minimized_output.gro -o E_minimized_output.pdb >>minlog.log &2>>minlog_err.log &
Listing 1: Current minimization instructions. If minimization is selected, these instructions are sequentially performed.
Download the correct extended force field package
Our download page provides you with the force field parameters required to run a simulation. Download the appropriate one for your needs and follow the instructions in the README.txt file.
1) Download the extended parameter files. Make sure you have the proper version agreeing with your GROMACS version, since formats have (slightly) changed. Also have a look at the current package version from time to time, since maintenance is going on.
2) Unzip the archive.
3) Add the content of file “FF_append.dat” to the end of file “../GROMACS_INSTALLATION/share/gromacs/top/FORCEFIELD.dat” and update the number on the first line, which is specifying the residue count (the number of entries below). This makes the new residue names known to your GROMACS simulation package.
4) Copy the file “aminoacids.dat” (or, in older versions “FORCEFIELD.dat”) to “../GROMACS_INSTALLATION/share/gromacs/top”.
5) Extract the remaining files (including the folder structure, if there is any) to the folder from which you plan to call pdb2gmx for your simulation. GROMACS checks the current directory first and only uses the standard parameter files if it cannot find a copy in the local folder.
6) If you plan to use PTMs not just for the current simulation but repeatedly, it might be useful to extend the standard parameter files with the additional content in the files. A backup of the original files is highly recommended.
Note: it is necessary to install these parameter files since you will need to provide parameter information concerning the modified residues to your MD simulation program (e.g. atom types, charges, bonds etc.).
General notes
Usage:
It is strongly recommended to use the same force field type for modification as for the simulation!
Access restriction:
Nobody can download or delete your file without the correct identification phrase (randomly generated and encoded in the links). We will not store copies of your PDB files after job deletion.
Citation:
Please, cite the articles printed at the very top of the literature page.
Contact:
If you have further questions, please check our board or, alternatively, contact us directly.